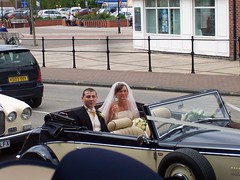
into this:

- Open the image you want to work on
- Check you are working in 'RGB' mode (Image > Mode >RGB)
- Duplicate background layer
- Window > Artwork & Effects
- In the Artwork & Effects palette on the right, choose the third icon along, then below, choose Photo Effects and Image Effects
- Highlight 'Tint Sepia' and drag the highlighted icon onto your image
- Filter > Noise > Add Noise
- Alter this as appropriate
- Bottom left - set foreground colour to a cream colour
- Layer > Fill Layer > Solid Colour
- Select the cream colour you chose. OK
- With your Colour Fill layer highlighted, but its 'eye' icon deselected (so you are working on the fill layer, but can't see it), use Elliptical Marquee Tool to draw an oval around the part of the image to be framed. Use the arrow keys to move the shape around
- Select > Feather > 25 (or so, experiment!)
- Make sure the Colour Fill layer is selected, and select the 'eye' icon to its left, then Edit > Delete
- This will show you the image in sepia, surrounded by a cream frame
- When you are happy, Select > Deselect
- If the framed image is off-centre, then Layer > Merge Down will merge the frame and sepia layers
- Highlight Background Copy layer and Fill Layer as before, using exactly the same Foreground colour which should still be selected
- Reselect sepia framed layer and select the Move tool. Move the image to a central point, then deselect
- Layer > Flatten image


8 comments:
Post a Comment